


In the previous post, we learned how to build a data collection bot – to define the collected data and to store it. Today, we’ll go to the next stage – chatbot integration with Google Sheets.
At cocohub.ai, we enable integrations of the collected data into various CRMs and databases, but let’s start with a common one – Google Spreadsheet.
Via Zapier, you can send all the data to a spreadsheet. You need to have a Zapier account (it’s free for the first 5 integrations, or Zaps).
And, of course, you’ll need to create a new spreadsheet. Now, let’s go to work.
1st stage: Creating the email address for integration
1. On Zapier, click on Create Zap
Here, we’ll integrate the Email Parser with Google Spreadsheets. So start with choosing the Email Parser (you’ll also need an account there – you can use your regular Zapier account)
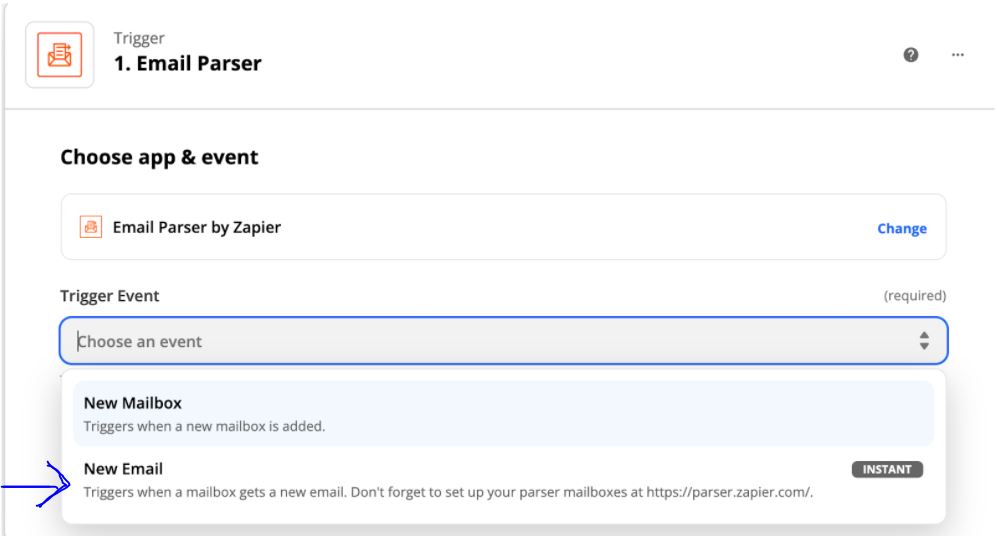
2. Go to the Email Parser by Zapier, then choose the “Trigger Event” – what will trigger the action.
In this case, when a conversation concludes, it will create a new email, so we’ll go with New Email – then, click “continue”
3. Create a new Zapier Email Parser account, or connect your relevant Zapier Email Parser account here.
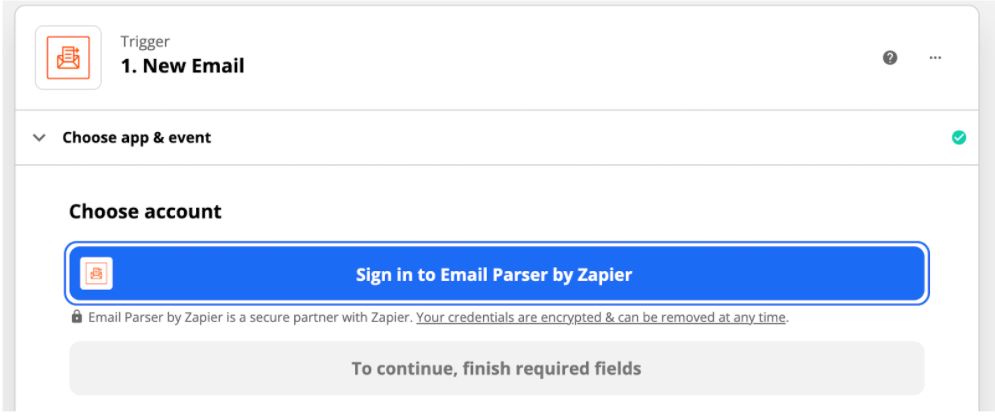
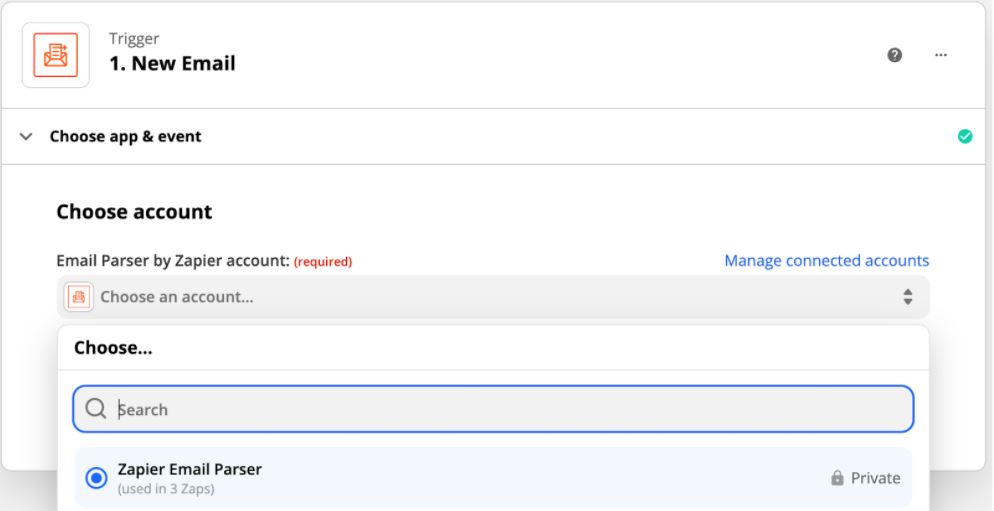
After that, click Continue
4. Click on the zapier.parser.email.
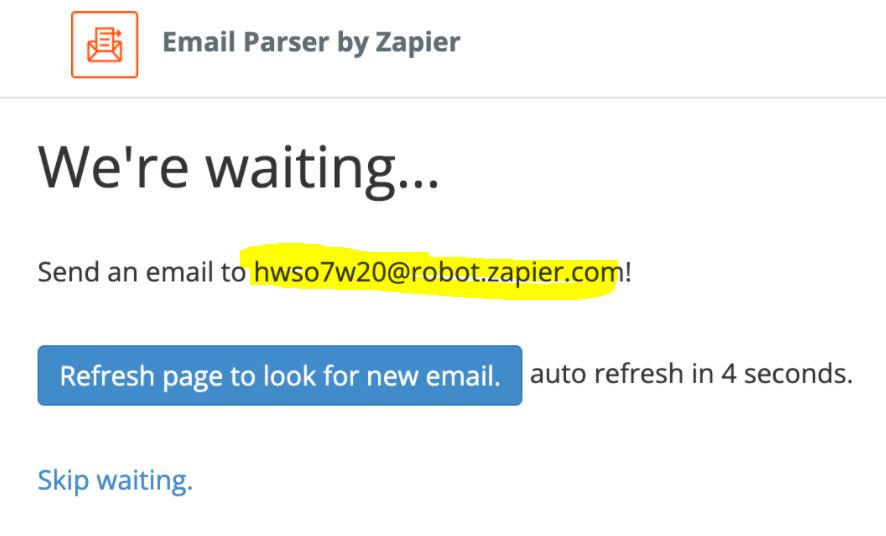
On the page that was open, click on “create mailbox”

5. Copy the mailbox’ address, for example this one:
2nd stage: Creating the mail’s template
6. Go back to the bot, to the send email component, and paste the address into the address row
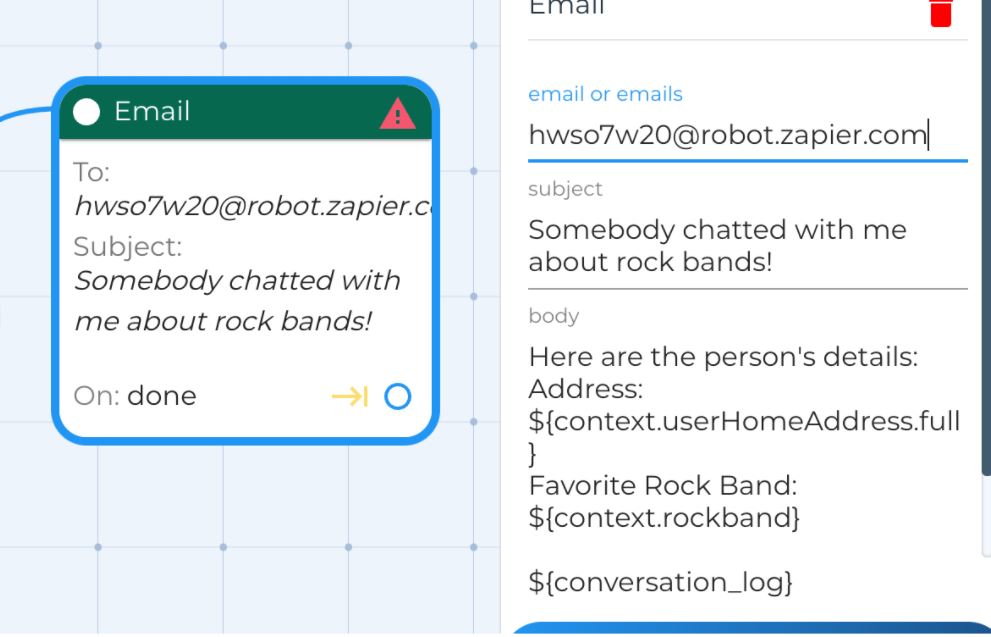
7. Run the bot’s best-case scenario (“happy path”) once, in the test project window, and make sure it reaches the end (the Send Email component).
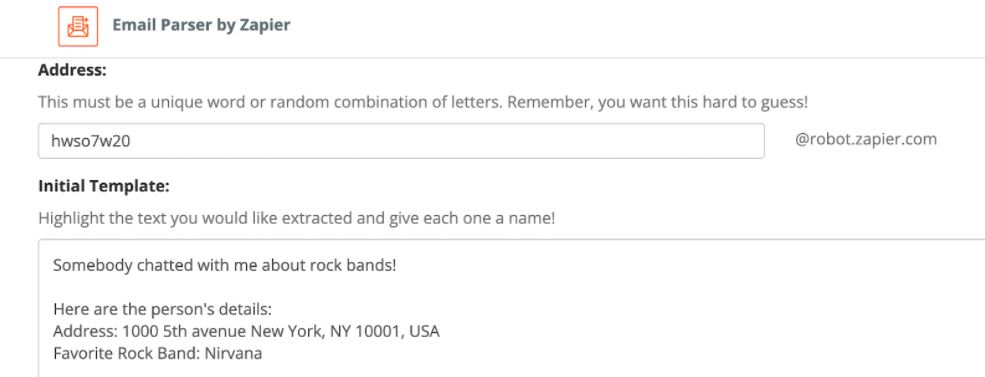
After you finished – in the Email Parser window you’ll see an email looking like that:
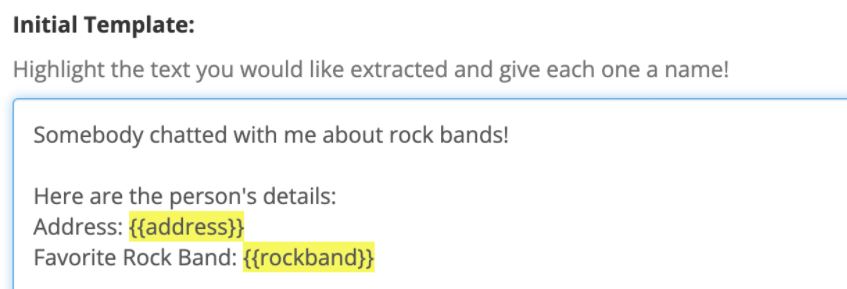
8. Now, catch the full answer that you want to turn into a parameter. A popup window will appear – type the parameter’s name, as you want it to appear
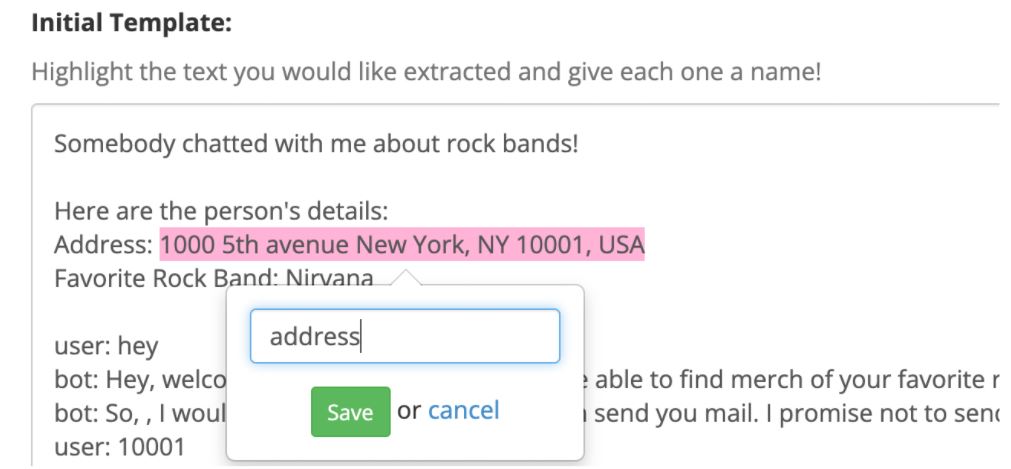
9. After clicking “Save” – and repeating the process until all the parameters are named, this is what happens – the previous answers will be replaced with the parameters’ names
10. On the same page, scroll down and click on “Save Address and Template” button.

Now, the template is ready!
3rd stage: testing the template
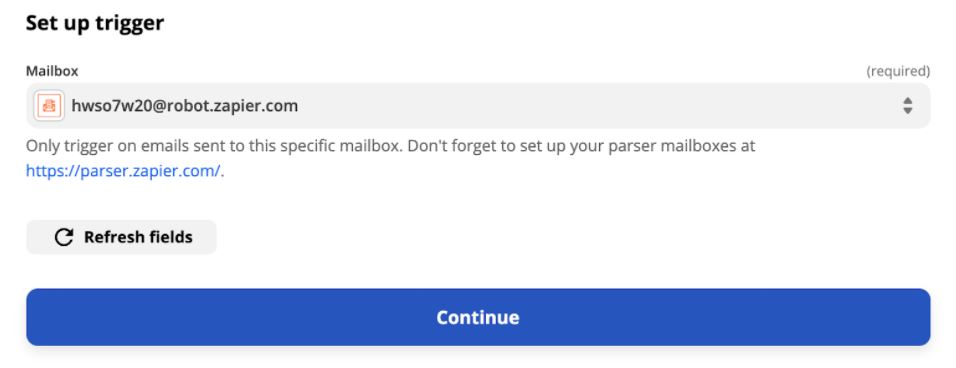
11. Go back to Zapier. Now, under set up trigger, click on the mailbox, find your relevant mailbox. After it’s set, click Continue
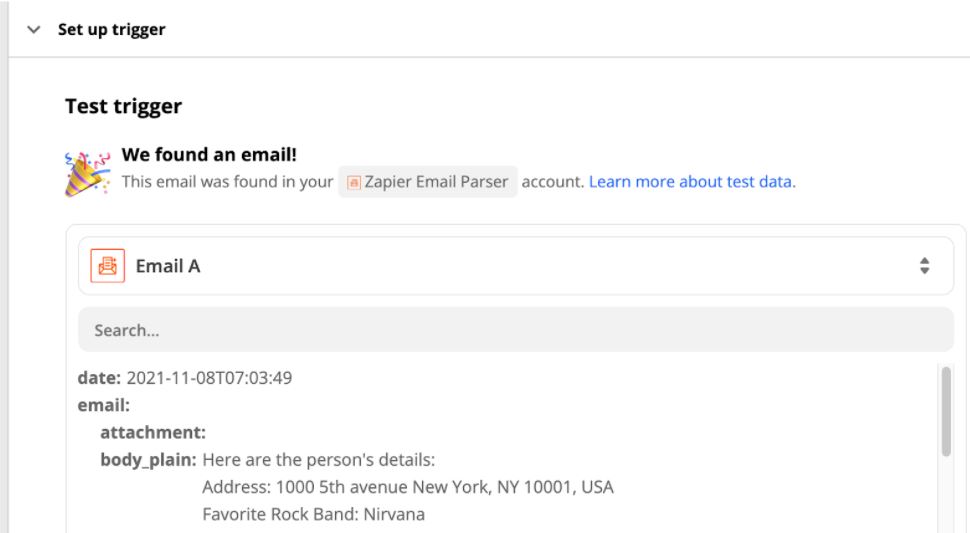
12. Now, in the next stage, click on “Test Trigger”. You’re supposed to see a screen like this, approving the process is working. Click “Continue”
Now it’s time to integrate it into the Spreadsheet!
4th stage: The integration comes alive
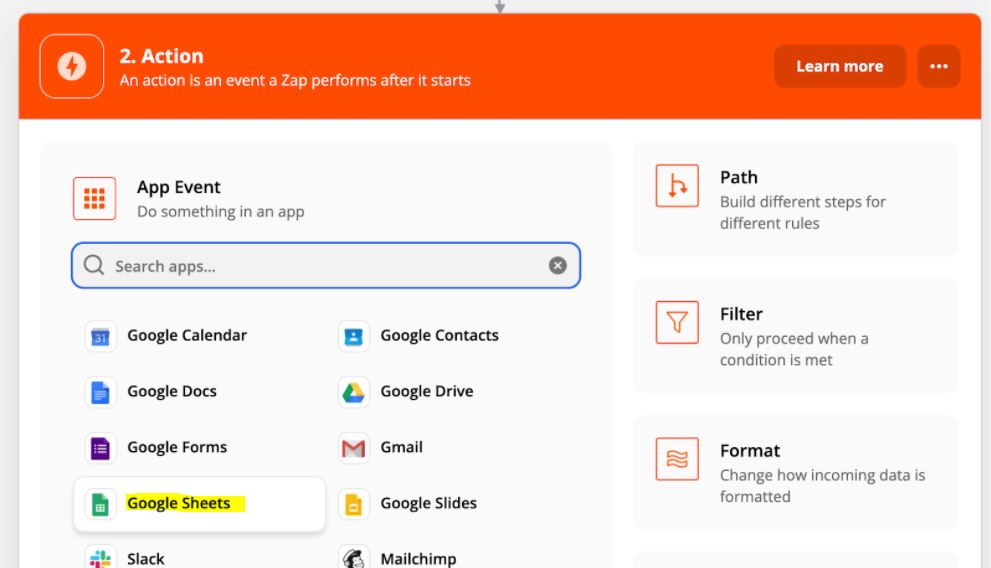
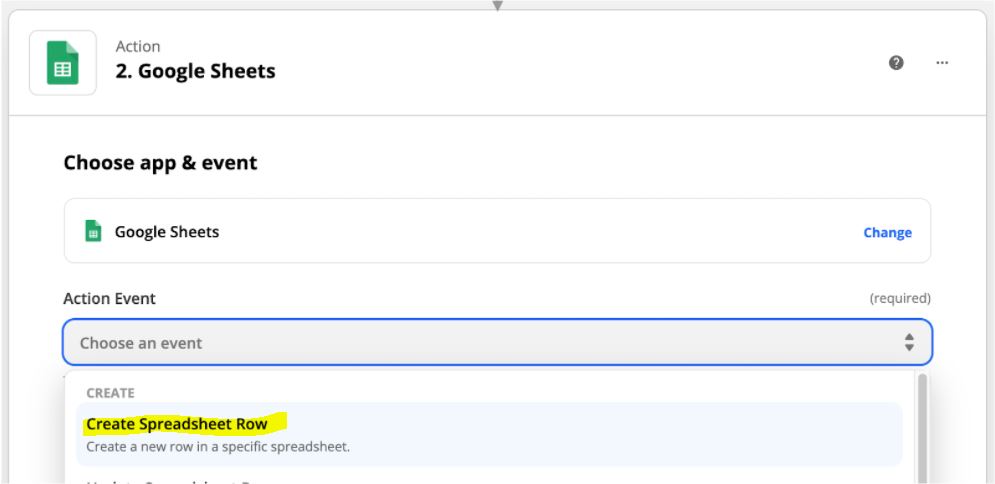
13. Choose Google Sheets from the options.
14. Open the “Action event” menu, click on “Create Spreadsheet row”
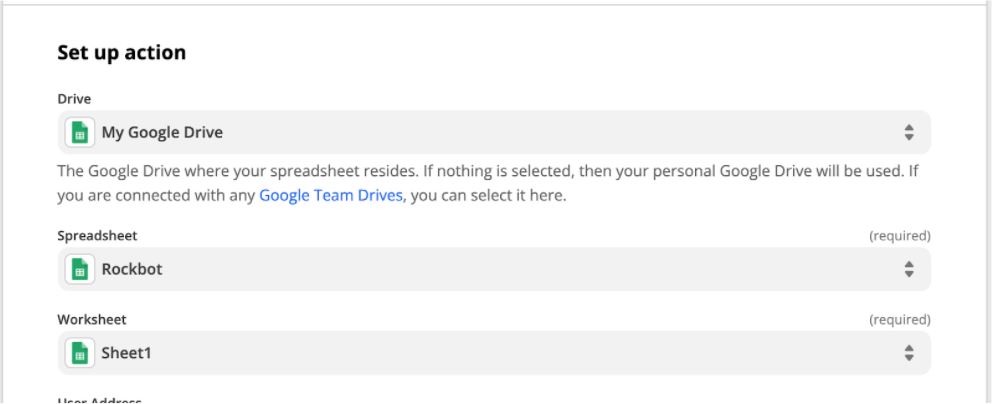
15. Choose your Google Spreadsheet account. Now, under “Set up action”, choose your Google Drive, the specific Spreadsheet, and the specific Worksheet
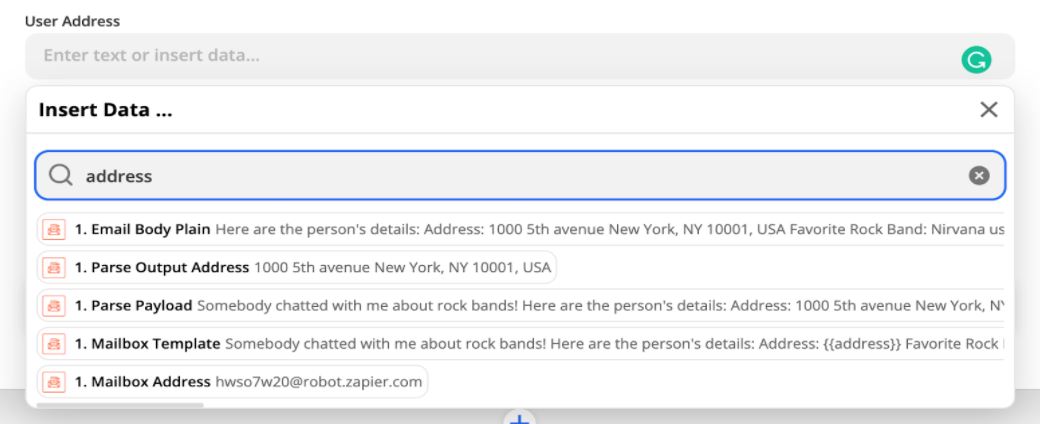
16. Remember the parameters we defined earlier (see #8)? Now we’re going to find them inside the test email’s content. If it doesn’t appear right away, click “show all options”, then search for the relevant word or phrase
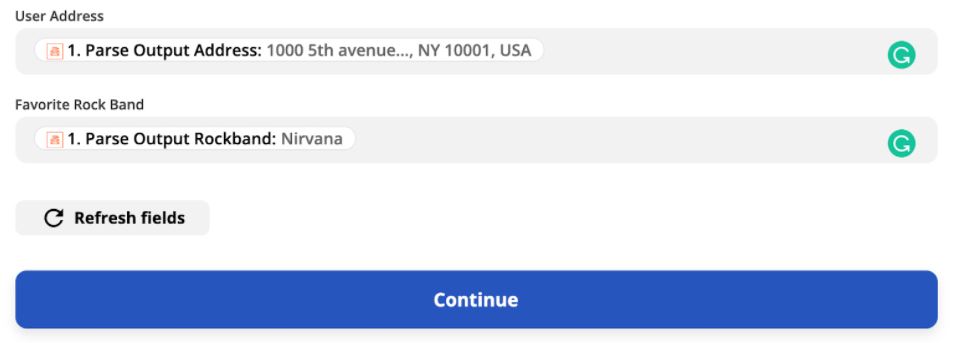
17. Once you found all the parameters, click continue
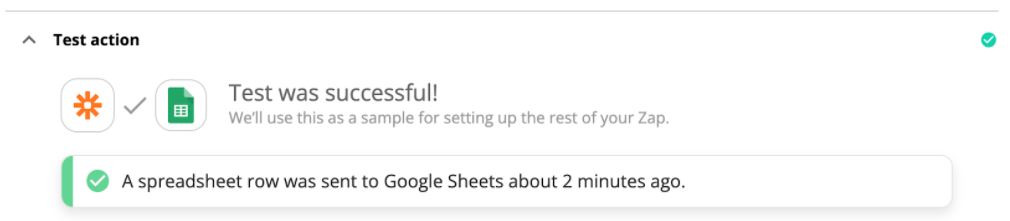
18. Under “Test Action”, click “Test & Continue”. Once the process is complete, you’ll see this on the screen:
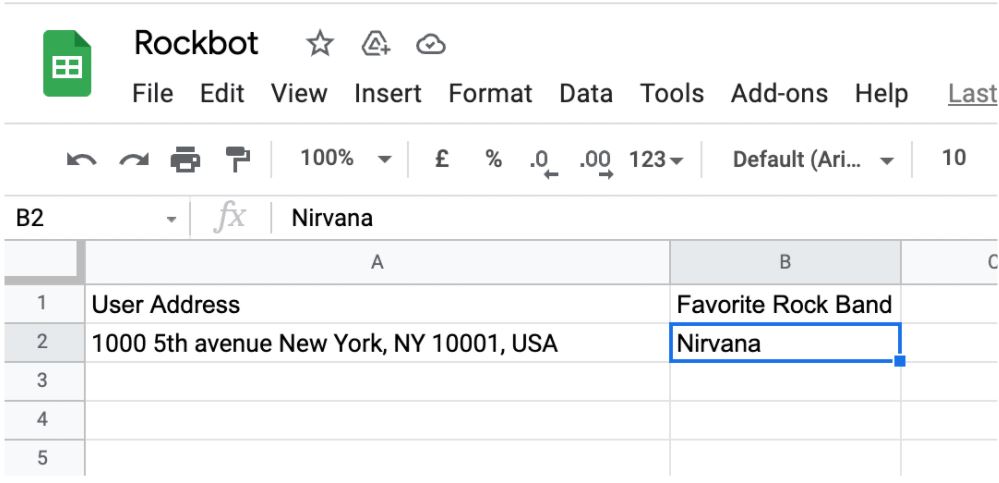
And on the Spreadsheet, you’ll see the collected data:
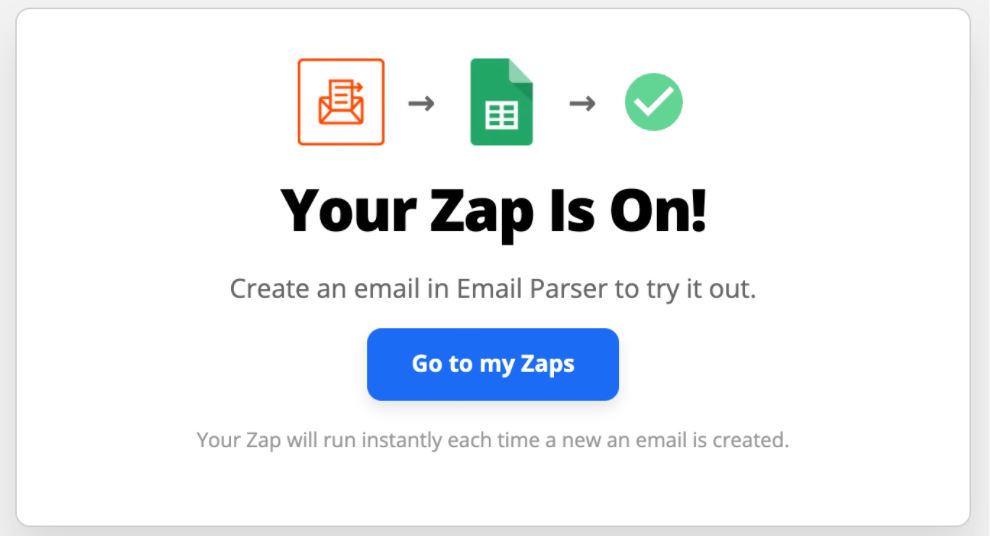
19. Click “Turn on Zap”, and this screen will appear:
Congratulations! Now, start sending people to talk with the bot, and get all the data you need.
Good luck!
If you still need help – contact us here.